Fund Designations: Campaigns and Subcampaigns
Last updated: September 24, 2026
Looking to set up different funds, ministry locations, or gift designations for your donors? You’ve come to the right place! We’re here to guide you through it every step of the way.
The Funds module is where you set up campaigns and subcampaigns that help direct donations to the right place. Please note that these designations aren't limited to a single asset class; they'll show up across all of them in Overflow.
Creating New Funds
Campaigns
In your Dashboard, go to the Funds module.
Click Create Campaign.
Enter your campaign details.
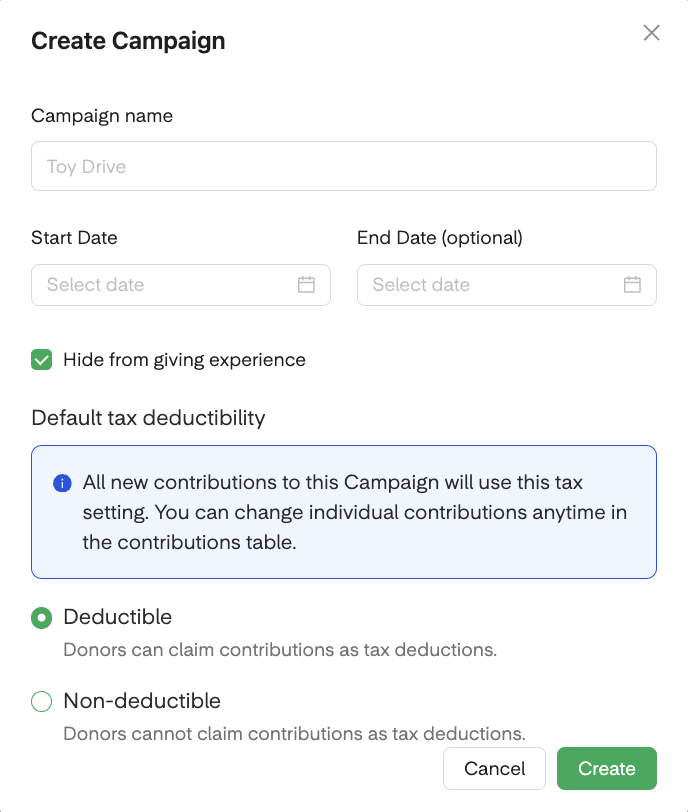
📝 Name (Up to 100 characters): The name you set here will apply to all giving flows.
🗓 Start Date: You can launch the campaign immediately or schedule it to go live at a future date.
⏳ End Date (Optional): You have the option to set an end date (or leave it blank, if you’d like the campaign to always remain visible).
Note: Expired campaigns will still be visible in your Funds module, but donors won’t see it in the giving experience after this date.
However, any recurring donations that were already scheduled before the expiration will continue unless the donor updates or cancels their gift.
🧾 Default Tax Deductibility: All new donations will use this tax setting. (You can individually or bulk edit gifts through the Contributions table.)
⛔️ Hide from Giving Experience (Optional) — If checked, the campaign won't appear in the dropdown menu when donors choose a fund.
Subcampaigns
In your Dashboard, go to the Funds module.
Select the Subcampaigns tab, located next to Campaigns.
Click Create Subcampaign.
Enter your subcampaign details.
📝 Name (Up to 100 characters): Similar to campaigns, the name you set here will apply to all asset class donation experiences you have with Overflow.
✅ Checkbox: You can choose to apply this subcampaign to all current and future subcampaigns.
Example: A church with multiple campuses might have Tithes & Offerings as a fund shared across all of them. In that case, you'd create a separate campaign for each campus, then set up Tithes & Offerings as a subcampaign so it automatically shows up under every one.
📂 Parent Campaign: If you don’t apply the subcampaign to all campaigns, you’ll need to choose which parent campaign it belongs to.
🗓 Start Date: Select the date you’d like the subcampaign to appear to donors.
If you choose a date earlier than the parent campaign’s start date, it won’t show until the parent campaign is live.
If the subcampaign starts after the parent campaign, the parent will display on its own until the subcampaign’s start date.
⏳ End Date (Optional): Set the date when the subcampaign should stop appearing to donors.
Note: Expired subcampaigns will still be visible in your Funds module, but donors won’t see it in the giving experience after this date.
However, any recurring donations that were already scheduled before the expiration will continue unless the donor updates or cancels their gift.
Managing Funds
Requiring Selection
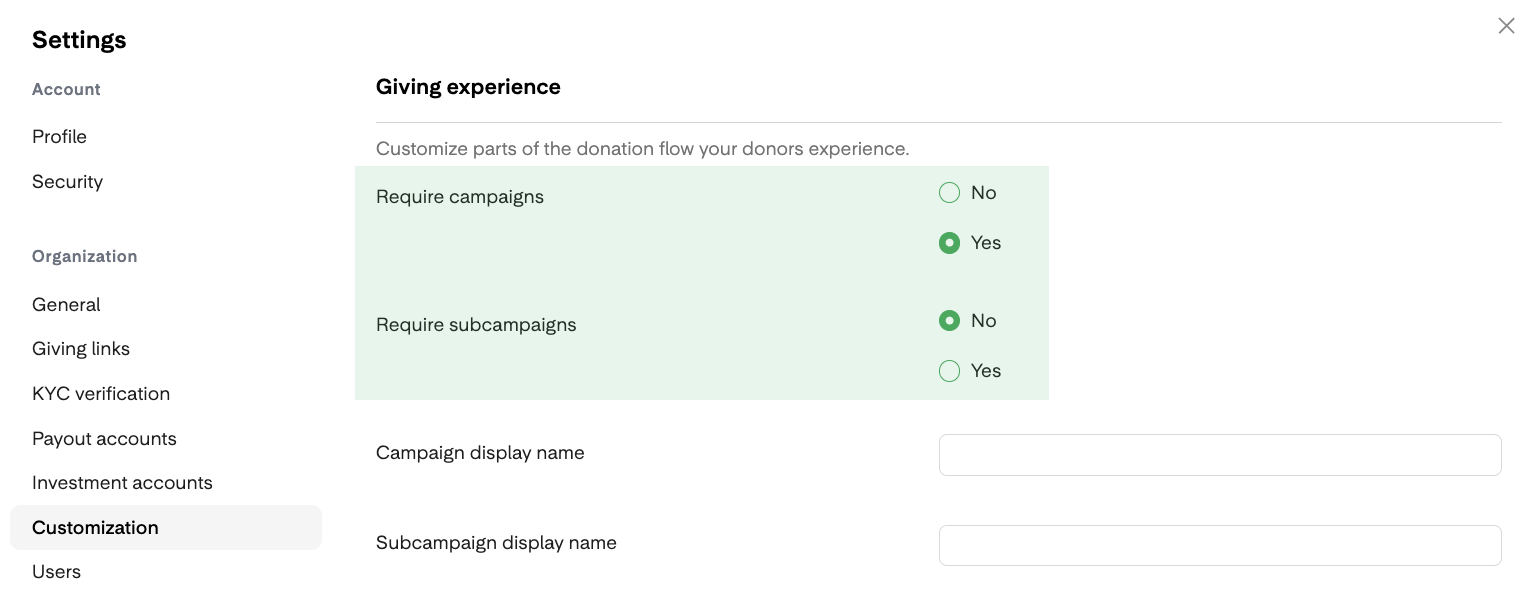
In your Dashboard, go to Settings and click the Customization tab.
Choose whether you’d like to make campaigns or subcampaign selection required in the giving experience.
👍🏽 These options will become available once you've created at least 1 active campaign (or subcampaign) in your Dashboard.
If these fields weren’t previously required, our Engineering team can help retroactively fill in any blank campaign or subcampaign values across all past donations.️
Once you’ve made all changes, click Save.
Editing and Deleting
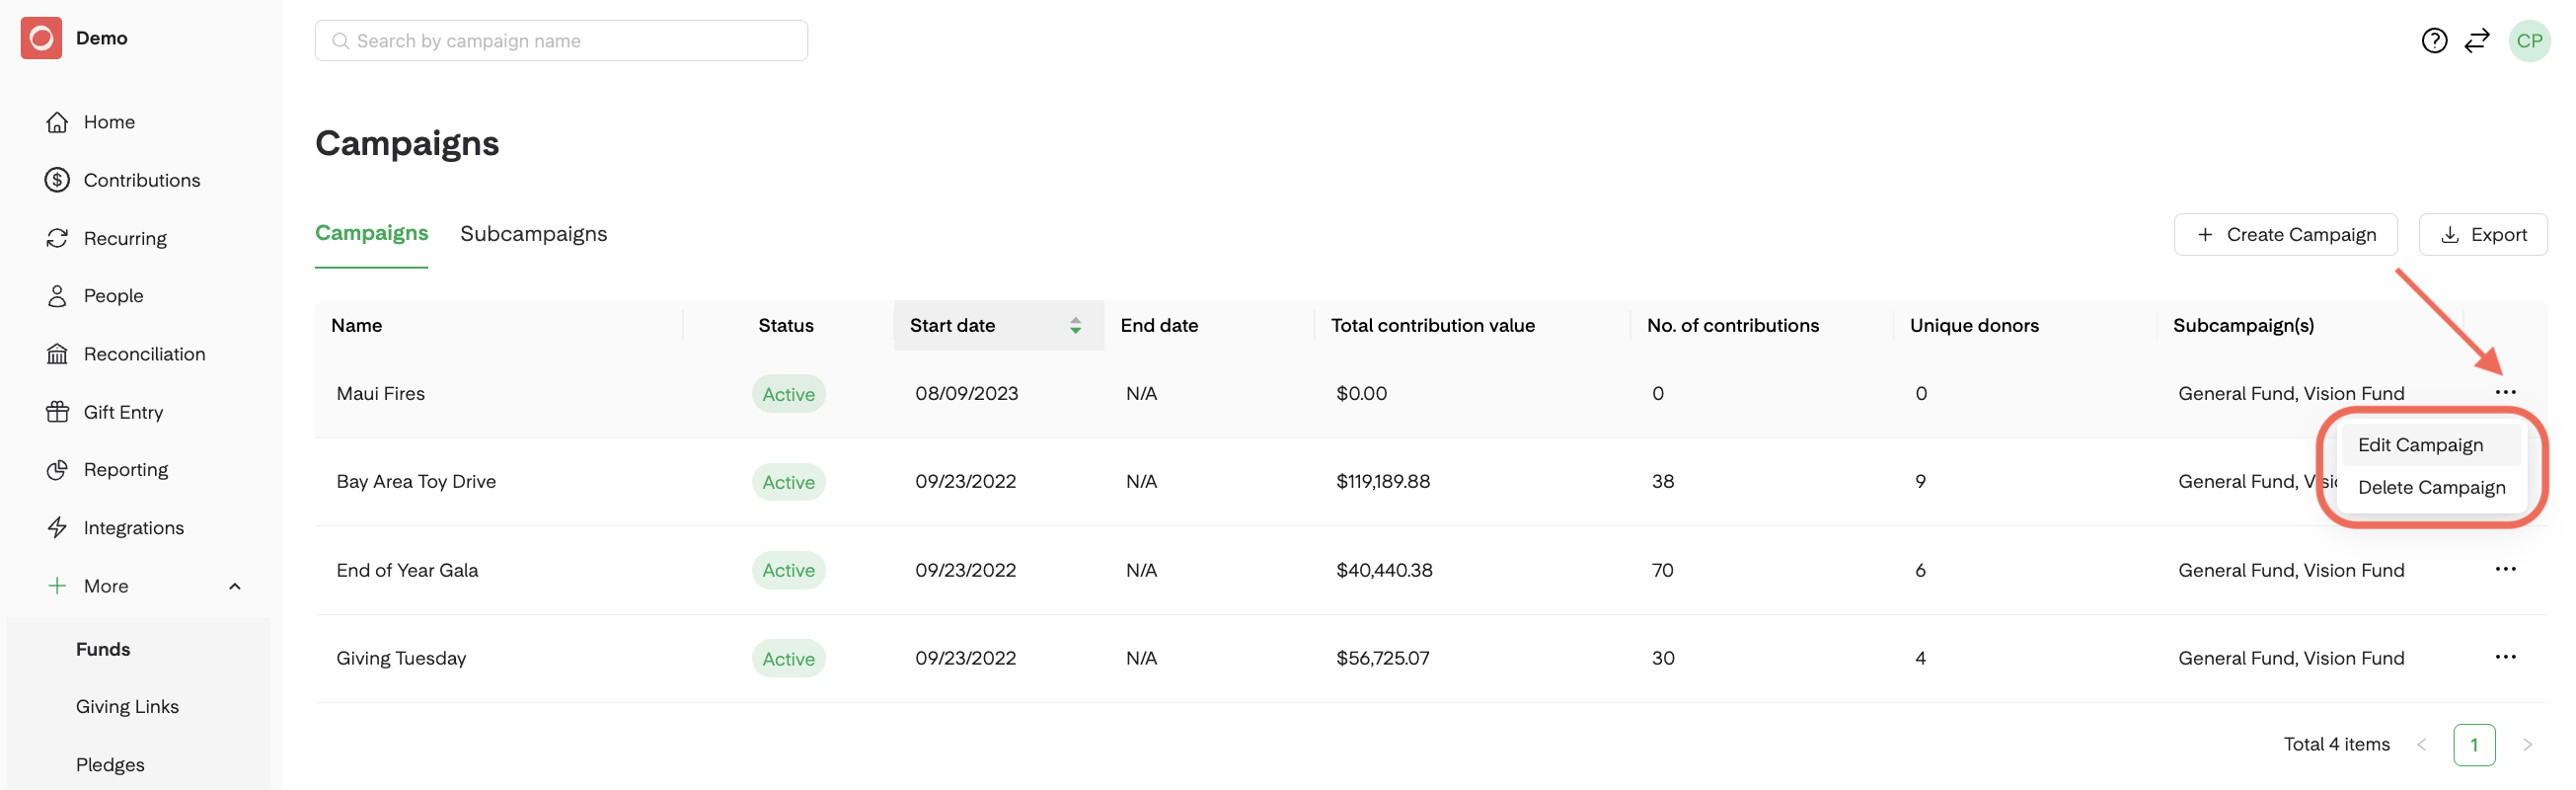
Click the ellipsis (⋯) at the end of the campaign or subcampaign row.
Select Edit Campaign or Delete Campaign from the dropdown menu.
Reordering
While you can't reorder funds in the Dashboard, our Support team will happily arrange your campaigns/subcampaigns in the sequence you want donors to see.
Additional Customization
Personalize your donors' giving experience by toggling on different Customization settings. These updates apply across all active campaigns:
Donor Covers the Fees: Let donors choose to help cover processing fees.
Dedications: Allow donors to give in honor or in memory of someone special.
Donor Notes: Give donors the chance to leave a personal note with their gift.
Require Donor Address: Make it required for donors to enter their mailing address when donating.
Giving Language: Choose the word your donors see (Donate or Give) throughout the giving experience.
FAQs
Why is a Fund ID Showing Instead of the Campaign Name?
If a fund is set to inactive or hidden from donors, the system will display the Fund ID as a fallback reference. Please be assured that all donations are still being recorded correctly.