Sending Printed Statements
Last updated: September 25, 2026
Printed statements are useful for donors without an email address or those who prefer a physical copy. This guide shows you how to generate, download, and print statements, step by step, for easy mailing.
Preparing Mailed Statements
Giving statements include donors’ mailing addresses, so you can fold the document to display the address in an envelope window. ✉
Alternatively, you can use Microsoft Word’s mail merge to print address labels or print directly on envelopes. (You can export donors' mailing addresses from the People module.)
Make sure to include a return address, so any undeliverable statements are returned to your organization.
Printing Statements
After exporting, statements appear as individual PDFs.
✅ For the most efficient printing, combine them into a single PDF first. This keeps the pages in order and ensures consistent printer settings.
⚠ Printing individual PDFs is slower and less reliable for large batches, since each file prints separately.
Mac (macOS)
Select all PDFs in Finder.
Right-click, then choose Quick Actions → Create PDF.
Open the combined file in Preview.
You can also drag pages in Preview’s sidebar to reorder before printing.
Go to File → Print and adjust settings as needed.
Windows (PC)
Select all PDFs in File Explorer.
Right-click and choose Print.
Choose Microsoft Print to PDF as your printer.
Save the merged file.
Open that file and print once.
Best Practices
Print a small batch first to check formatting, spacing, and envelope fit before mailing the full batch.
Double-check that multi-page statements are complete and in order before printing or mailing. (For the best results, print single-sided.)
Keep electronic copies of statements in a secure location for record-keeping and future reference. You can also download batches anytime through your Dashboard.
Finding Donors Without Emails
To identify donors who need mailed statements:
Contributions Table: Sort the Email column in ascending order to see which Donor Profiles are missing an email address.
Statements Module: After generating a batch, sort the Email column in ascending order. (Donors without emails will appear blank in that column.)
Helpful Tips
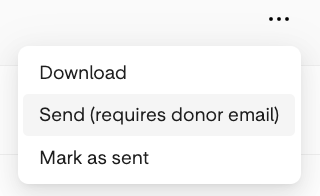
Click the ellipsis (⋯) next to a donor without an email to see Send (Requires Donor Email). If selected, the status remains Ready to Send until the statement is downloaded.
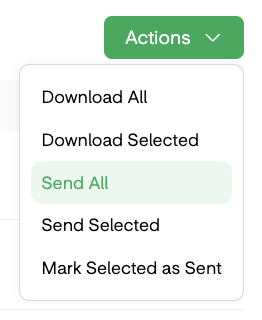
Using Send All will email statements only to donors with emails. You can then sort the Status column to quickly see who still needs a mailed statement.
Exporting Statements
Check the box next to each donor missing an email address.
From the Actions dropdown, select Download Selected.
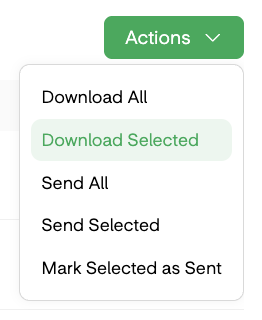
The statements will download as a ZIP folder, with one PDF per donor.